Programming Mode, Backing up and Flashing your board for use with Mystery Interstellar Arcade
Step 1 - Installing Drivers
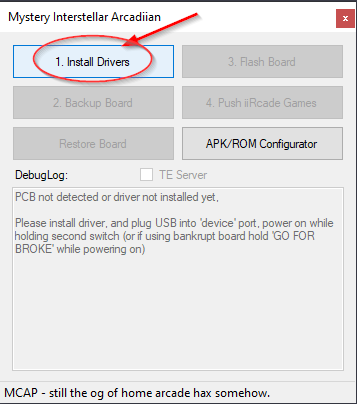
Step 1.1: Click the "Install Drivers" button.
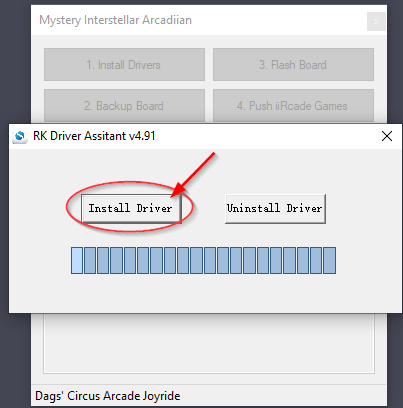
Step 1.2: You'll now have a new window labeled "RK Driver Assistant v4.91." Click "Install Driver" in this window.
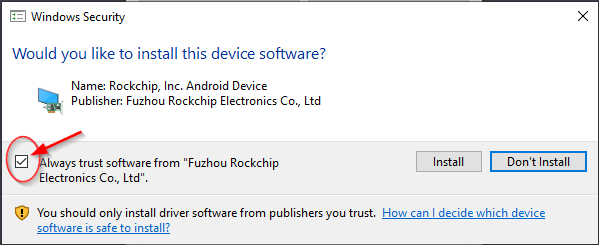
Step 1.3: On the Windows Security pop-up displayed below, ensure that you uncheck "Always trust" as shown.
Step 1.4: You can now click "Install" and wait a few seconds for the software to complete the installation of the driver.
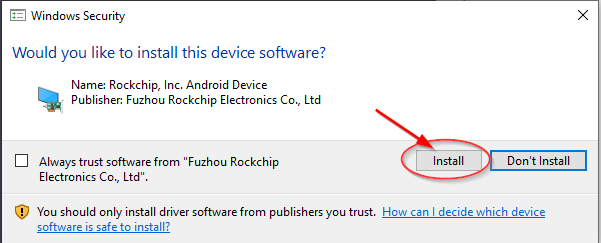
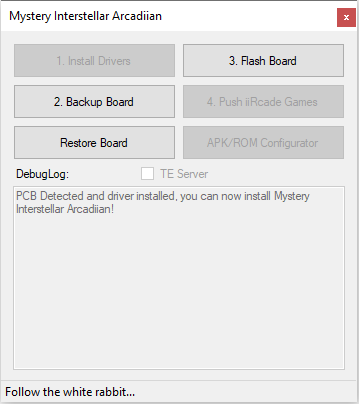
Step 1.5: If you've got the "Install driver ok." popup, you may now close both of these windows and return to Mystery Interstellar Arcadian (MIA).

Step 2 - USB-C cable and Programming Mode
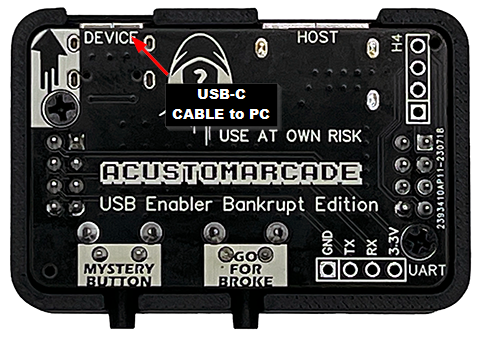
Step 2.1: At this point, you will need to take the USB-C cable that was included with the ACustomarcade/Team-Encoder USB enabler board and insert it into your USB enabler as well as your PC (connect the USB-C end to the board and the larger USB-A connector to your PC), You will still need this cable later, so it is recommended to either route it out the back of your cabinet or, route it through the vent holes in the control panel.
Make sure that you use the USB-C cable that was included with your USB Enabler board when you received it, using another USB-C can cause problems even if it's a high-quality USB-C cable we've still experienced issues.
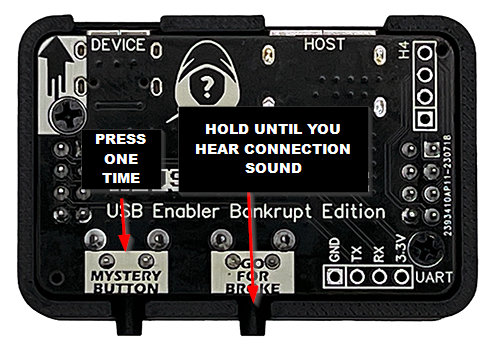
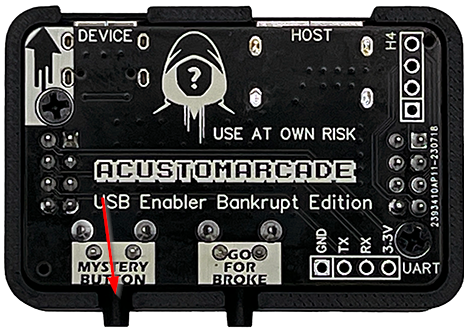
Step 2.2 At this point we're going to bring the cabinet into programming mode, make sure that your cabinet currently has power and is powered on. Next, go to the USB Enabler board and hold "go for broke" While holding "go for broke" press the mystery button one time while continuing to hold "go for broke" Do not let go of "go for broke" until the software plays a sound indicating that a connection as been established.
Step 2.3 Now the board is in programming mode and we should see the button for "2. Backup Board", "Restore Board" and "3. Flash Board" highlight and we can proceed to Step 3 - Backing up our board.
Note: Throughout the guide we will refer to two modes one is "Programming Mode" or "Go for Broke" mode, the other is "OS Mode" this part of the guide is entirely centered around programming mode!
Step 3 - Backing up our iiRcade to our PC
NOTE: You will want to turn off 'hibernate', 'sleep', 'Selective USB suspend' and other power options that may make your computer go to sleep while this backup process takes place, for a 64GB board this process can take a little over 3 hours, if you have a 128gb you're looking at over 6 hours to perform the complete backup.
NOTE: This does require that your PC has at least 140GB of available/free space, regardless of whether or not you have a 128gb board just to be safe. The backups will be stored in the same folder and drive that the software is running on.
Step 3.1 To get started you're going to simply click the "2.Backup Board" button as seen in the screenshot below.
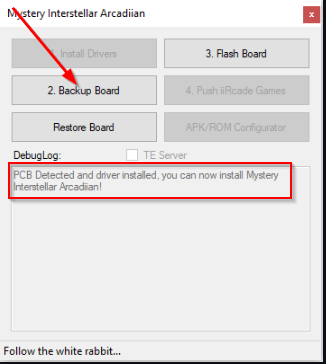
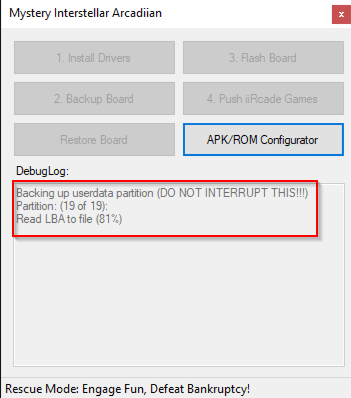
Note that the text on the screen is still stating the PCB is detected before the button is clicked, once this button is clicked we'll see progress and 19 total partitions will be backed up, if the process fails at any point in between an error will be produced letting you know what happened and you will be able to safely restart the application and try again.
If you continue to have issues it's advised to reach out to us on Discord.
Once the backup is started the partition that will take the longest amount of time is going to be partition 19 of 19 "userdata", while it's progressing you'll see an actual progress percentage as shown in the screenshot below.
Just leave this alone for a while and let it do its thing until eventually we get the finished message below, at which point we're finished and all hashes/etc have been verified to confirm we're on the expected firmware version and so on.
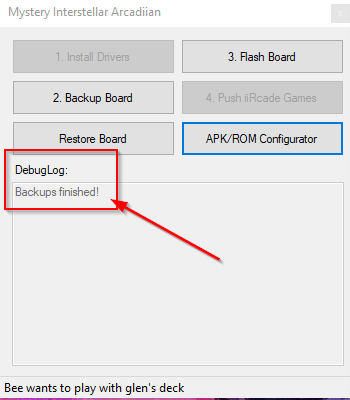
We can now move on to flashing our board in order to enable the additional capabilities of the software in OS mode.
NOTE: Your backup will be in the same folder as the MIA software, it's highly recommended you compress it as it is possible for it to be well over 64GB-128GB depending on which cabinet you have, compressing it should greatly reduce this size for safekeeping, if you don't know how to compress the backup don't worry about it just make sure you back it up to a USB drive or something of the sort so you don't take up the space on your PC.
Step 4 - Flashing the board!
Welcome to the last and final step of 'programming mode' or 'go for broke mode', after this unless you need to recover your board from corruption or a mistake you make in the future you will no longer need access to the buttons on the USB Enabler and can restore your control deck to its full functioning form after completing this step. From here on once this is completed you will only need the USB-C cable and by default, the cabinet will boot into OS mode which we'll cover in a later portion of this guide in more detail.
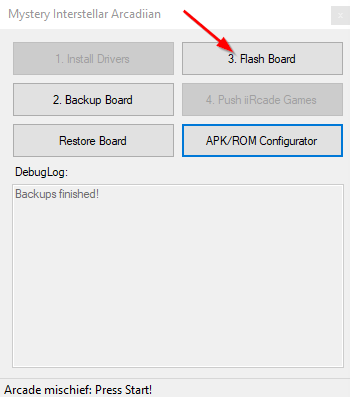
To begin simply click "3. Flash board" as shown in the screenshot below:
This process should take about 20-30mins to complete fully, if something should happen while flashing the board such as your PC goes to sleep or the process does not complete DO NOT use the 'restore board' function. Simply repeat the "3. Flash Board" function have cycling power on the board and restart the application.
This is a complete partition re-write, and as such you do not want to attempt restoring to stock again instead re-use the flash board option as instructed above.
While the process is going just leave it alone, and let it do its thing for the 20-30 mins it takes, when it's finished you'll see the message below and we're finished with this portion of our guide.
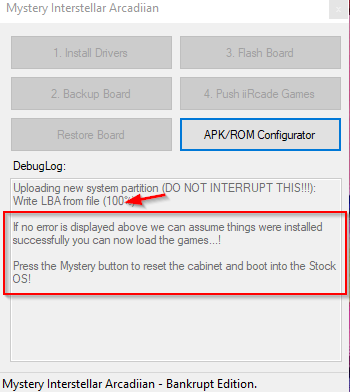
At this point after following the instructions on the application pressing the "Mystery button" - ONE TIME, without holding the Go for broke button this time.
You'll see the cabinet boot normally and can continue on to the next part of this guide related to utilizing the OS mode.
Next Page:
2. OS Mode, Building iiGames Packages, and Pushing/Installing games on the Cabinet